This is a new bug that annoys Windows 10 users.
Although there are many improvements and new upgrades, according to Microsoft’s “tradition”, Windows 10 still contains many small errors. In the long run, that will make users feel very uncomfortable, one of which is an error display the message “No Internet, Secured”. What is surprising is that even though it displays “No Internet, Secured”, you still really have regular Internet access. So what is causing the problem, and how do you solve it?
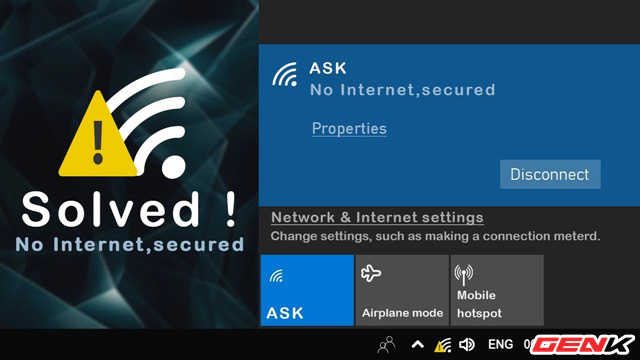
In general, the reason why Windows 10 displays the message ” No Internet, Secured ” is due to the wrong setting of the IP address when connecting to the network. Therefore, you can overcome it quickly through the following suggested solutions if you are experiencing this situation.
1. Refresh the IP configuration
The quickest and easiest way to resolve the “No Internet, Secured” error message on Windows 10 is to refresh the computer’s IP configuration. Doing this will help you reassign your IP address while also fixing the problem if the cause is caused by IP allocation. Specifically, you run two commands in Windows Powershell as follows.
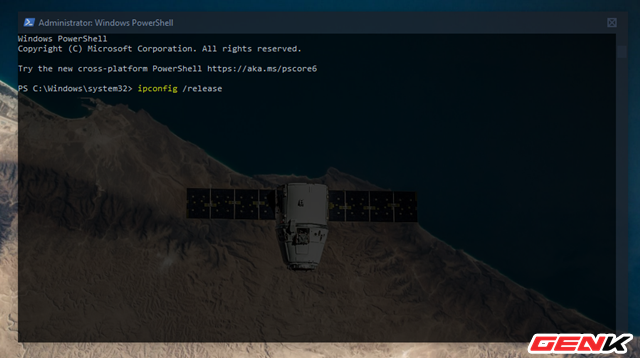
The first is “ipconfig / release”.
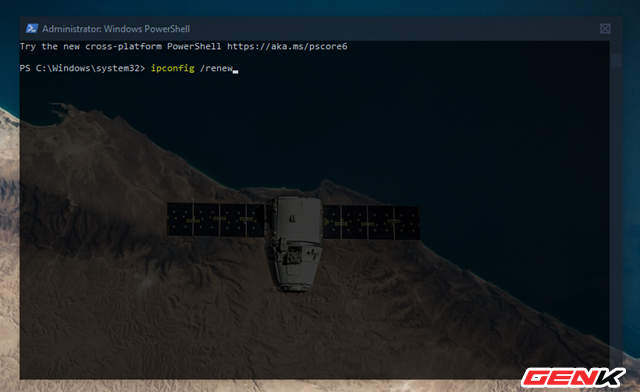
Then “ipconfig / renew”.
At the end of each statement is the ENTER key to execute. The change will take effect immediately.
2. Disable VPN settings
Sometimes, the VPN utility’s security layer on your computer can also cause the “No Internet, Secured” error on Windows 10. Therefore, what you need to do next is turn off or exit altogether. VPN utility is in use. Wait a few minutes, reconnect to the internet, and then open a website with regularly updated content such as a news website to check results.
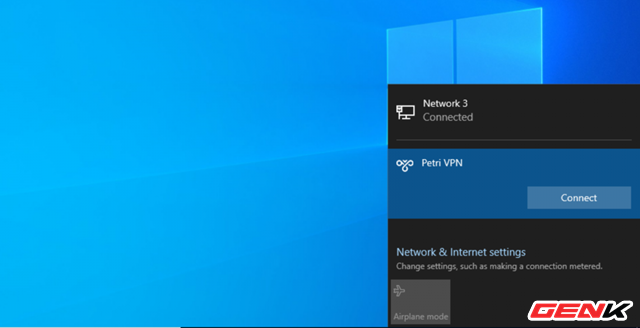
If everything returns to normal, the cause is the VPN server. At this point, removing or upgrading is what you should do.
3. Reinstall Winsock
If you do not already know, Winsock (or Winsock protocol) controls many communication processes on your Windows 10 computer with network services. The reinstalling (reset) Winsock will help change some of the default settings and eliminate problems that arise, including the “No Internet, Secured” error.
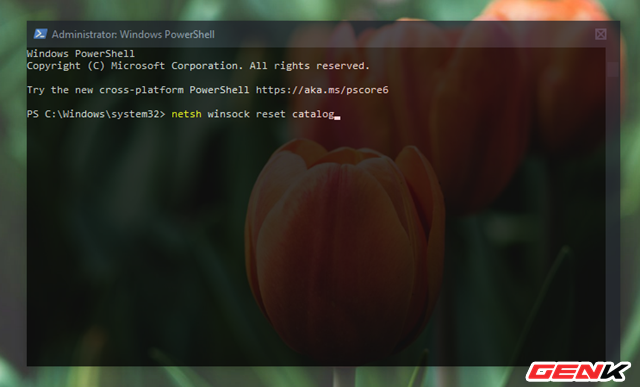
To reinstall Winsock, run the ” netsh Winsock reset catalog ” command in Windows Powershell.
4. Check the connection properties of the computer
On Windows 10, there are many “small links” that connect to your Internet connection, which means many things need to have your internet connection to work correctly.

To check if everything is in order on Windows 10 system, right-click the Wi-Fi or “Internet” icon in the system tray and select “Network & Internet Settings”.
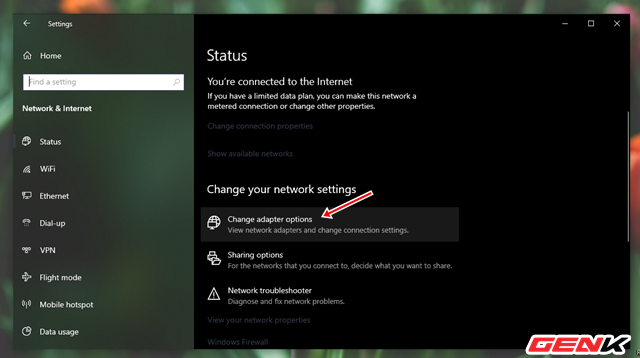
Continue to click the “Change adapter options” option in the Settings window that appears.
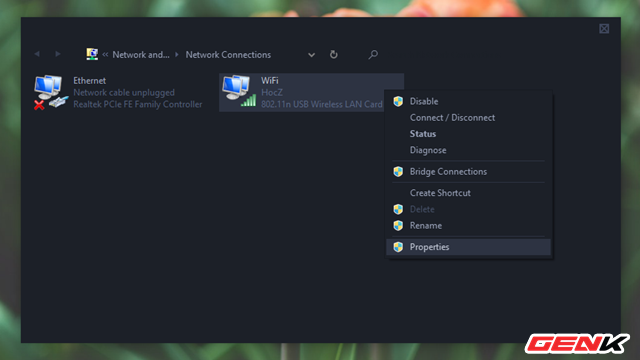
A window showing the type of network connection on the computer appears. Right-click the kind of relationship you are using and select Properties.
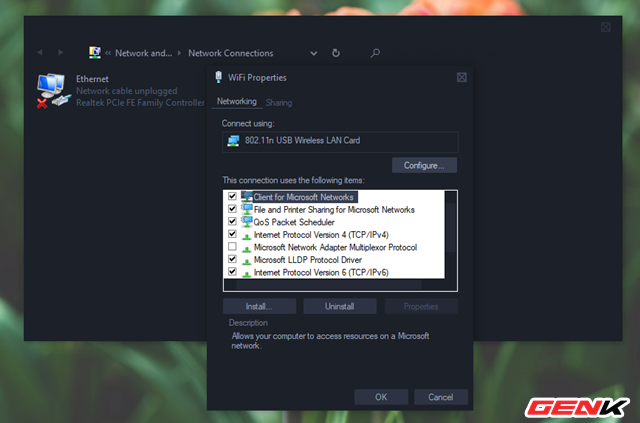
The Properties window appears, check and check all the options: Client for Microsoft Networks, File and Printer Sharing, Internet Protocol Version 4, Internet Protocol Version 6, Link-layer Topology Discovery Responder.
Finally, click OK to save.
5. Disable IPv6
IPv6 is a relatively new internet protocol that more and more PCs are now switching to because the number of available IPv4 addresses is gone. However, not all network devices and ISPs work well with iPv6, so if you enable this protocol, it may interfere with your connection (or you can connect to the Internet via IPv4). ) The PC will still inform you that the IPv6 relationship is not having an Internet signal.
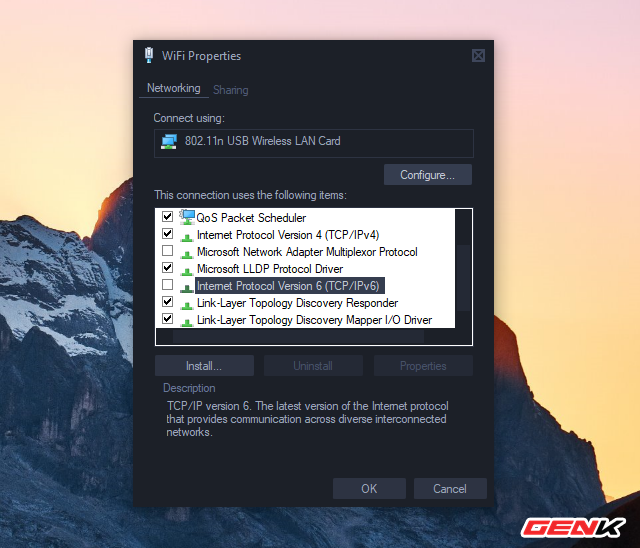
To disable IPv6, disable the “Internet Protocol Version 6” option in your connection properties. The operation is similar to method 4.
6. Update network driver again
Your network card driver is most likely faulty, so you also need to perform a driver update to fix the error.
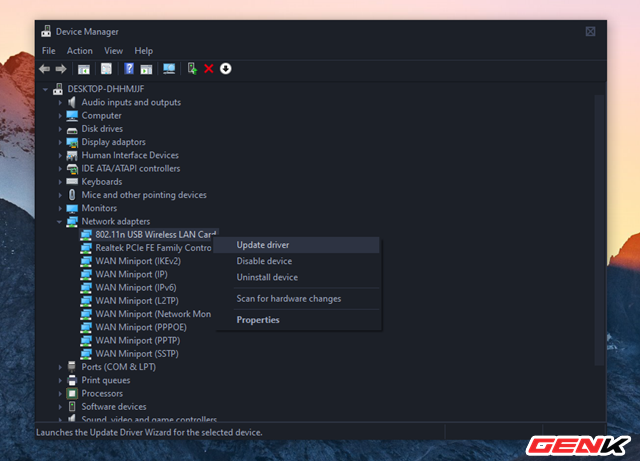
The update is also quite simple, open Device Manager, expand the Network Adapters hardware group. Find the network device you are using and right-click it, select Update Driver.
7. Use Network Troubleshooter on Windows 10
Finally, if Windows still displays the message “No Internet, Secured” and the computer still has access to the network, you can try this last resort.
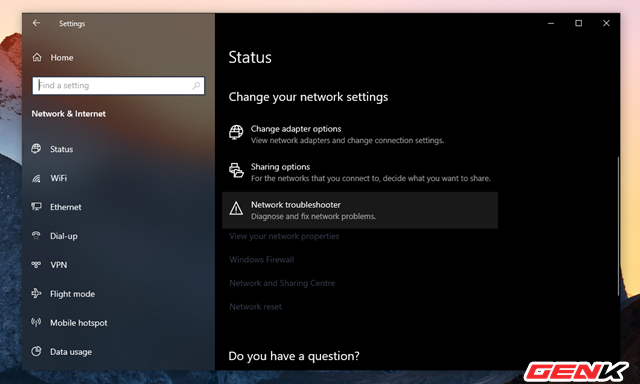
Windows 10 comes with several tools to help you with some basic troubleshooting, and they will automatically check and perform (or suggest) fixing the problem. To launch the Troubleshooter, go to Settings> Network & internet> Network troubleshooter. Follow the steps to correct the problem.
I hope the article will be useful to you.
Source: GenK


