You upgrade Windows 8 to the latest version of Windows 10. But the laptop cannot connect to the wireless network (WiFi). After fighting hard to install the latest driver files for the network adapter, we could finally connect to the internet via WiFi. But the process of connecting to a Wi-Fi laptop loses connection while in use.
In this post, we want to share all the things we tried to solve WiFi connection problems.
No Internet connection – Network Adapter problem
When you find your computer is unable to connect wirelessly after upgrading Windows 10, the most likely reason is the network adapter. Follow the steps below to fix this problem:
- Right-click on the “Start” menu and select “Device Manager” or use the “Cortana” search box next to the “Start” menu and open “Device Manager”.
- Find out the adapters used on your computer in the “Network adapters” section.
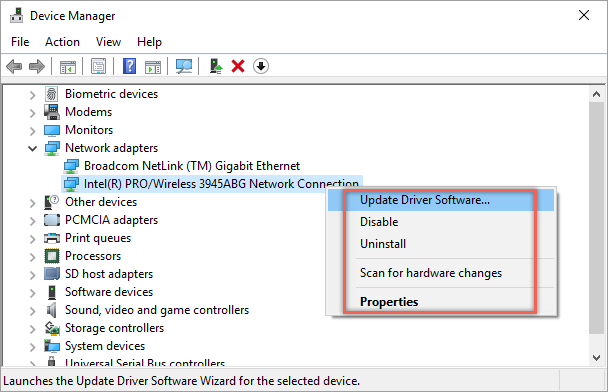
- In our case, it is “Intel (R) PRO / Wireless 3945ABG”. Go to the vendor page and download the latest driver file for Windows 10.
- Uninstall the old driver and install the newly downloaded driver.
- Click “Scan for hardware changes” to re-enable the adapter with the newly installed driver.
This should solve the problem of connecting to the wireless network.
Turn off Airplane Mode
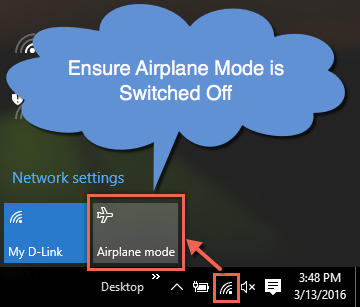
Windows 10 has an option to disable wireless connections by quickly using “Airplane Mode”. Click on the WiFi icon in the tray and check your Airplane Mode is turned off.
WiFi connection Usually Off
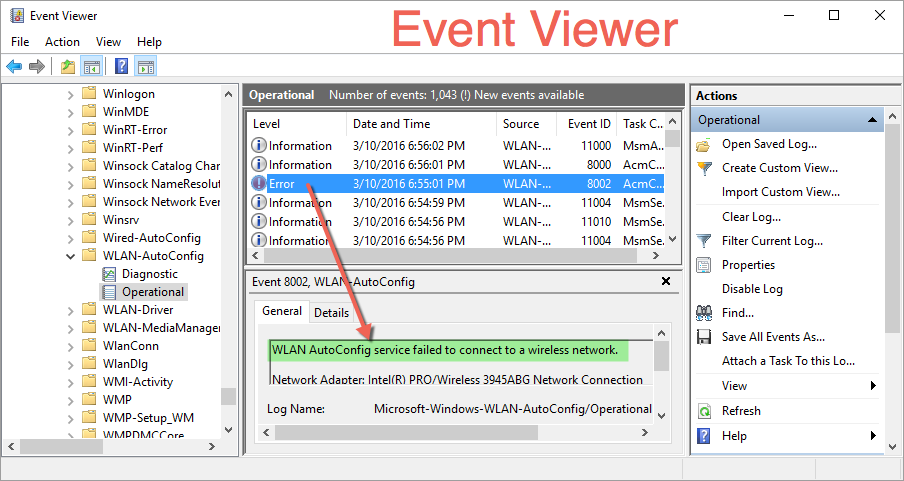
It took several days to realize that the WiFi connection has dropped frequently due to laptops’ problems. Since we use a VPN, that is the first suspect, and the router is the second. When the same VPN and router ultimately worked with the iPhone, we were forced to look at the Windows laptop for clues. When looking at “Events Viewer”, it confirms that the network has been dropped frequently with the error message “WLAN AutoConfig service failed to connect to a wireless network”.
Disable Network Discovery
Open “Network and Sharing Center” and click on the wireless internet connection you are using.
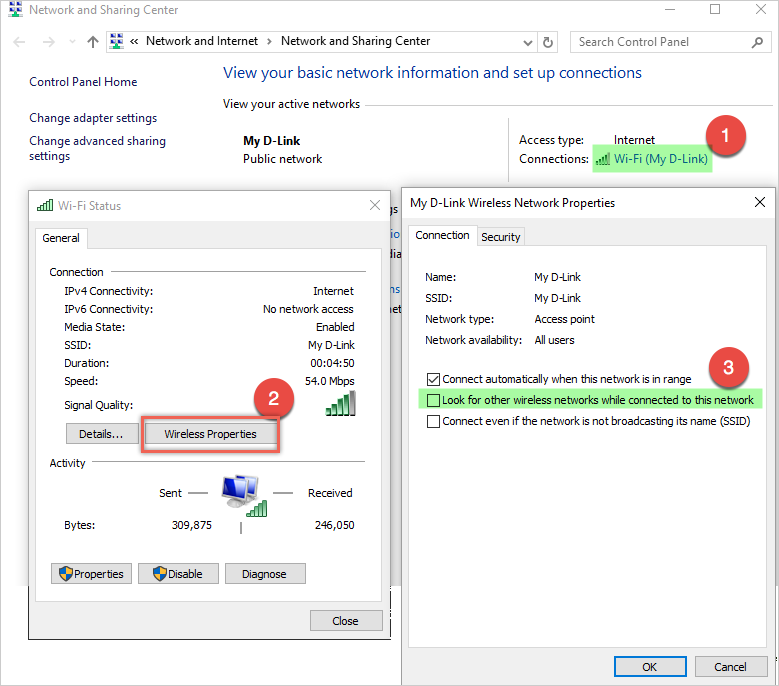
Clicking the “Wireless Properties” button in the “General” section will take you to the properties of your wireless connection. Disable the option “Look for other wireless networks while connected to this network” under the “Connection” tab.
Install Power Management
Open “Network and Sharing Center” and click on your wireless connection name. This time click the “Properties” button in the “Activity” section.
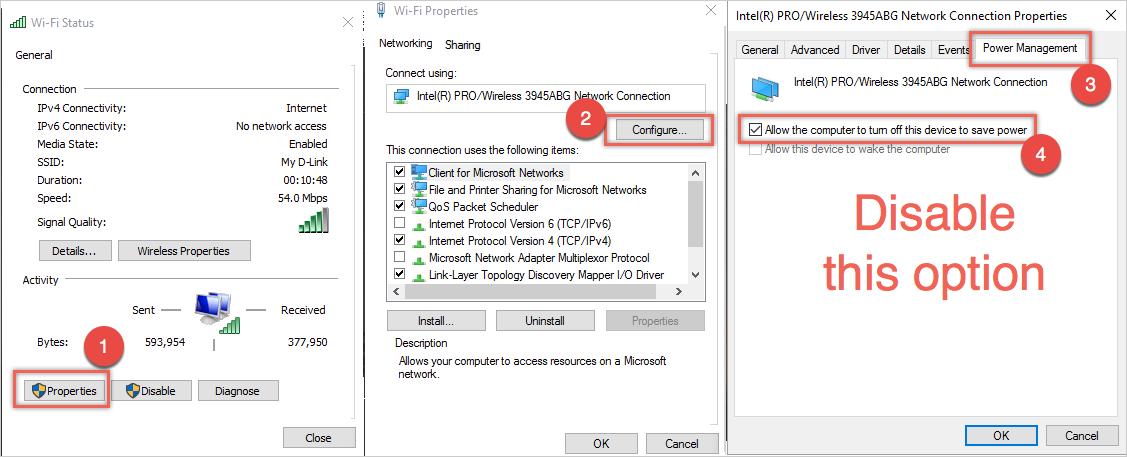
You will be taken to the “Wi-Fi Properties” pop-up window and click the “Configure” button to connect to your wireless router. The next pop-up will show your wireless router’s network connection properties and disable the option “Allow the computer to turn off this device to save power” in the “Power Management” tab.
Option 3 – Disable IPv6
IPv6 addressing was introduced with IPv4 address exhaustion, and currently, both IPv4 and IPv6 are used by most services. You can try it out by disabling IPv6 connectivity under your “Power Management”.
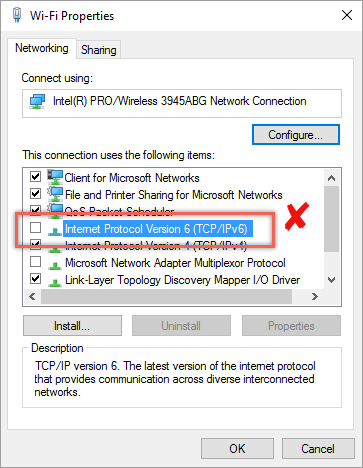
4 – Restart computer browser service
Right-click on the Windows taskbar and click on the option “Task Manager”. By default, the “Browser” services will be in a “Running” state that can be seen in the “Services” tab. Right-click on the service “Browser” and “Restart” it.
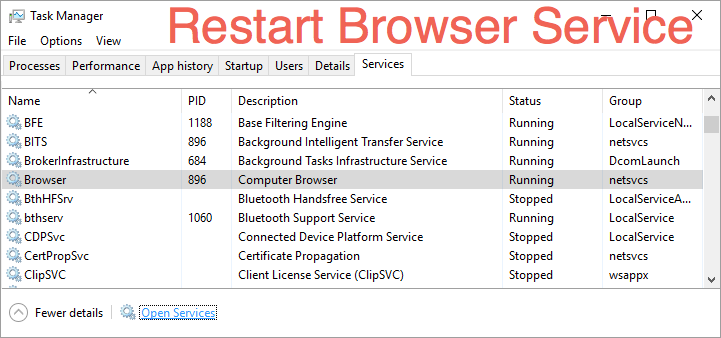
Restart computer browser service
Option 5 – Turn off Bluetooth Discovery Mode
If you have Bluetooth enabled on your laptop, navigate to Bluetooth settings, and click “More Bluetooth options”. Then disable the option “Allow Bluetooth devices to find this PC” in the “Discovery” section.
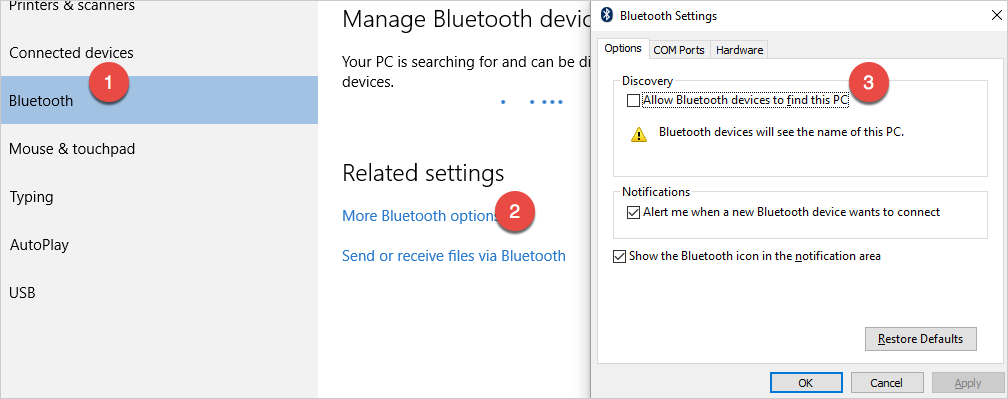
Disable Bluetooth Discovery Settings
Conclusion
We have looked at all the popular Microsoft forums and other popular ones, and it is clear that the wireless connection problem is something to do with Windows and not the router. Unfortunately, this issue has not been resolved with any suitable solution. Although option 2 worked for us, you may need to try different options for a stable WiFi connection.


