Many of my tips are related to modifying the Windows Registry. The first step of the process always explains how to make a backup of the Registry before editing.

Today, I will take the steps to backup and restore the Registry in my way.
I recommend that you always back up the Registry before you try to make any changes to it. That way, if something goes wrong, you can restore it to its previous (working) state.
Back up the Windows Registry
It is effortless to make a backup copy of the Windows Registry. Just follow the steps below:
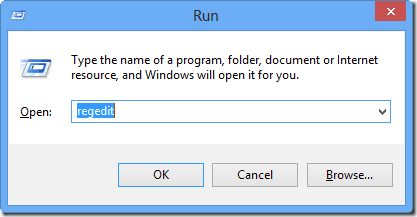
1 – Press the Windows + R key combination to open the “ Run ” box.
2 – Type regedit and press the Enter key.

3 – Click File > Export, name the backup file, and then click Save.

4 – Click File> Exit to close Registry Editor.
Restore Windows Registry
And follow these steps to restore the Registry from a backup file (Note: Registry backup files end with the .reg file extension):
1 – Press the Windows + R key combination to open the “Run” box.
2 – Type regedit and press the Enter key.

3 – Click File > Import .
4 – Navigate to the Registry backup file you want to restore from (again, it will have .reg extension) and double-click it. Follow the prompts until the process is complete.
5 – Click File > Exit to close Registry Editor.
Now you know how to back up the Windows Registry before making changes to it and restore it if something goes wrong.


