When someone has access for a while and needs to access your Windows computer or tablet, you don’t have to create a new user account for them, and you should not give them the details. The best solution is to enable the Guest account in Windows and ask them to use it. This will keep your files or system settings safe. In this guide, we will explain about the Guest account and how to enable this feature in Windows 7 and Windows 8, 8.1. We’ll end this tutorial by sharing how to disable it when you no longer need it.
What is the Guest account in Windows?
The Guest account in Windows is a local user account with minimal permissions. It has the following limitations:
- It has no password, and a password cannot be set for it.
- Cannot install the desktop application, program, or hardware device.
- This application can only use applications and desktop programs installed on your computer or device when the Guest account is activated.
- Cannot change the account type, name, or image.
- Cannot change the settings of other user accounts.
- It cannot access user libraries and folders of other user accounts.
- It can only create files on the Desktop and its user folders. It cannot create folders and files anywhere else on your computer or device.
- The Guest user account can only be enabled or disabled by the administrator.
Sound perfect? When guests want to use my computer, the Guest account allows them to browse the web, access Facebook or YouTube while keeping my settings, works, and files away from prying eyes.
Steps to enable or disable Guest Accounts in User Accounts
Since the Guest account allows users to log on to the network, access the Internet, and shut down the computer, you should disable the Guest account when not in use.
1. Click Start and open Control Panel, and click the User Accounts icon.
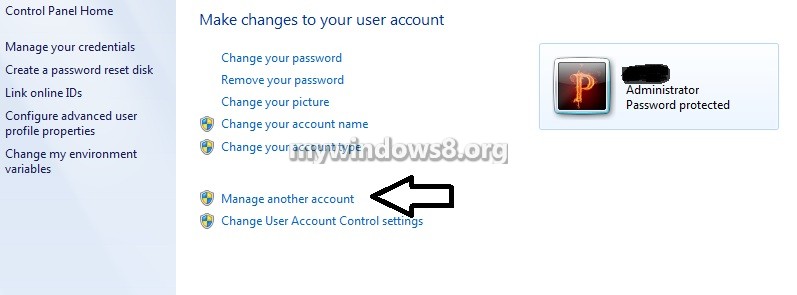
2. Click the Manage another account link.

3. If asked to Install User Access Control, then click Yes.
4. Click the listed Guest account.

5. To Enable Guest Accounts, click the Turn On button.

6. To Deactivate a Guest Account, click the Turn off the guest account link.

7. When you are done with the above step, close the User Accounts window.
Enable or Disable Guest Account in Command Prompt
1. Open the command prompt in administrative mode from the Start menu.
2. To switch the Guest account, in the command prompt that opens, paste the command below, press Enter.
net user Guest / active: yes

3. To deactivate the Guest account, in the command prompt that opens, paste the command below, press Enter.
net user Guest / active: no

4. You can close the command prompt if you want.
Enable or Disable Guest Accounts at Local Users and Groups
1. Open Local Users and Groups.
2. Click Users in the left pane and double-click Guest in the middle pane.

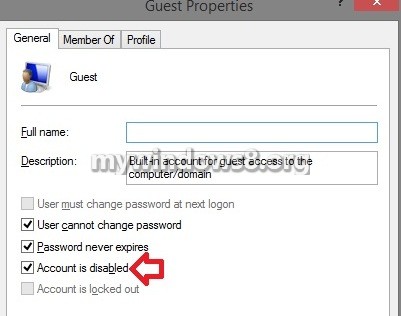
3. To Enable Guest Account, uncheck the box Account is disabled, click OK

4. To Disable Guest Account, check the box Account is disabled, and click OK to enable the settings.
5. You can close the Local Users and Groups window if you want.


