In Windows 8.x, OneDrive was integrated into the operating system through an application that you couldn’t uninstall, and settings were quickly accessible from PC settings. Users can easily upload files and folders through modern apps and even share them with others without using the OneDrive web interface.
In Windows 10, the software giant is deleting apps and configuring cloud storage services from the Settings app. This favors a deeper OneDrive integration inside the operating system with a user interface similar to the app’s desktop version. However, in the current state, the folder or file sharing becomes more challenging to do, as, in this new Windows 10 tutorial, we will take steps to share the folder and files successfully. OneDrive with others.
Share a folder in OneDrive
While inside Windows 10, sharing a folder using OneDrive can be done in many ways. If you only need to share those files, pictures, videos, and documents, create a folder in the root folder or anywhere in OneDrive. Then, right-click on the folder, and choose the Share an OneDrive link.

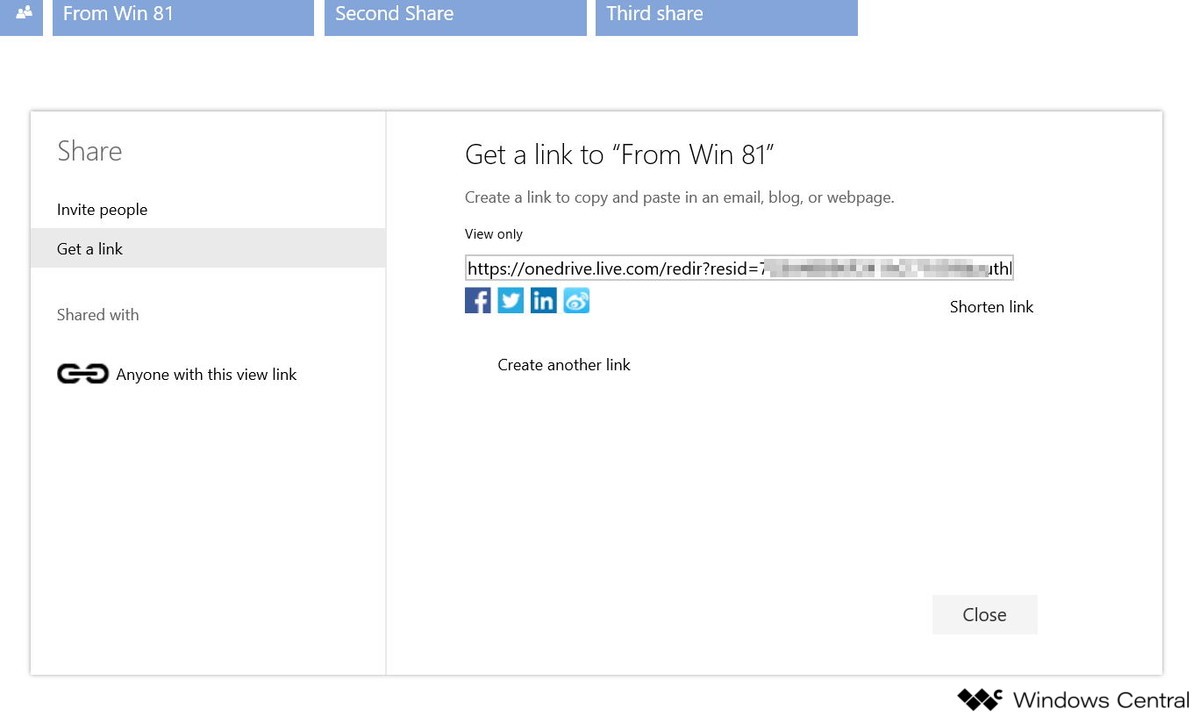
This will automatically share the folder in question with the default View permissions, and the unique link to access the folder is copied to the clipboard.
The link is a standard secure URL. This means that when you share it via email or other means, the shared folder opens in the OneDrive web interface using a web browser.
You’ll note which folders are shared as a blue icon will appear in the lower-left corner. For now, it should be noted that sharing the directory using this method will allow anyone with the link to access the directory and its contents.
![]()
If you want to control who can access the OneDrive folder, you can right-click on the shared folder and click More OneDrive sharing options (refer to the previous image). When you click this option, your default web browser opens OneDrive to the specific shared folder’s sharing options.
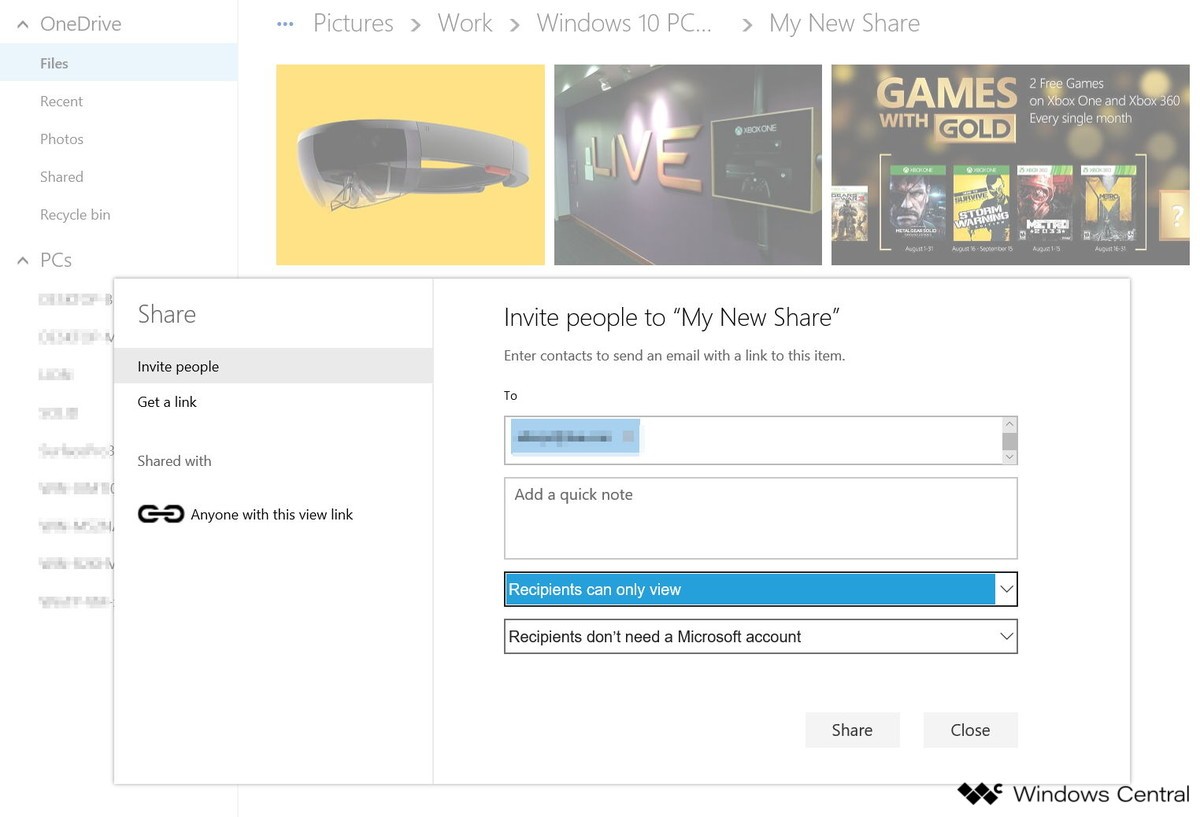
From the Share option, you’ll notice that you have an Invite people option. On the right, you can invite one or more people to access the shared folder and its contents.
Then the Recipients can only view the link. Clicking on the link will reveal additional sharing options you can set. The possibilities are self-explanatory; for example, you can choose Recipients can only view or Recipients can edit. Alternatively, you can restrict if you want to allow recipients to access files with or without a Microsoft account.

Once you’ve selected the settings you want, click the Share button.
If you try to share a folder from within Windows 10 by pressing the Share an OneDrive link, it should be noted. Even though you have specific share permission configured for a folder with one or more people, the folder will continue to be accessible as “view-only” to anyone with the sharing link. If you only want specific people to access the folder and its contents, you have to make sure that you navigate to Shared with. Under Share options, click Anyone with this view link and click Remove link, as you can see in the image below.

A few things you need to know about sharing folders with OneDrive
If you set sharing permissions for editing, the other person may re-share the same folder with others, which may be a security concern for some users. However, you can always go back to the Sharing settings to remove anyone you don’t want access to the shared folder.
It would be nice if the directory owner could get a notification when someone else shares a folder they don’t technically own, but it’s not the case. However, Microsoft recently started rolling out a new feature that notifies owners that a file share has been changed. On mobile, the OneDrive app shows real-time notifications, plus those sharing folders will also receive daily summary emails with details about who and when files were edited.
I’ve noticed that when you share a directory, you also share the directory path, so be careful not to reveal unnecessary information in the way. For example, avoid creating a folder called “People I don’t like,” and inside that folder, create another folder named “Work files” because when you share the folder, it will look like Files> People I don’t like> Work files.
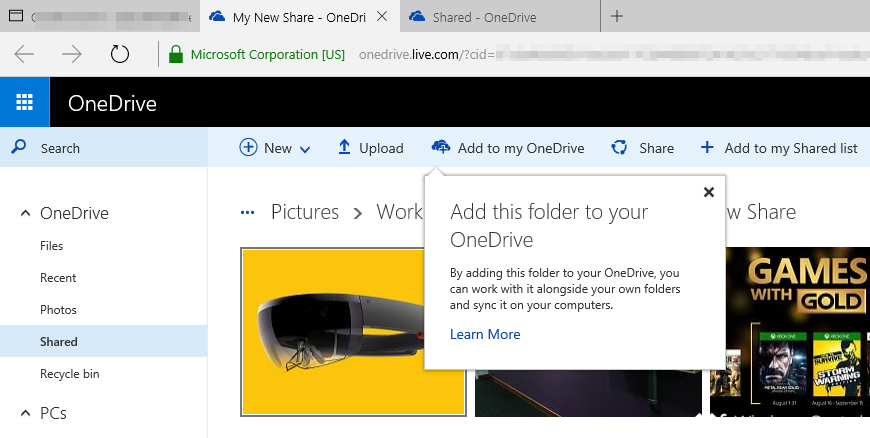
One nifty feature when you share a folder is the recipient’s ability to click Add to my OneDrive to make the folder available on any device. This means the folder and its content can be accessed not only on the web but also using File Explorer in Windows, and the recipient can also make the folder available offline. (Note that this only works when you set edit permissions, not view-only access.)

It’s important to remember that sharing a folder in OneDrive is not the same as creating a local share in Windows. Once you share a folder, it will not be available in the network. It will only be available through OneDrive.
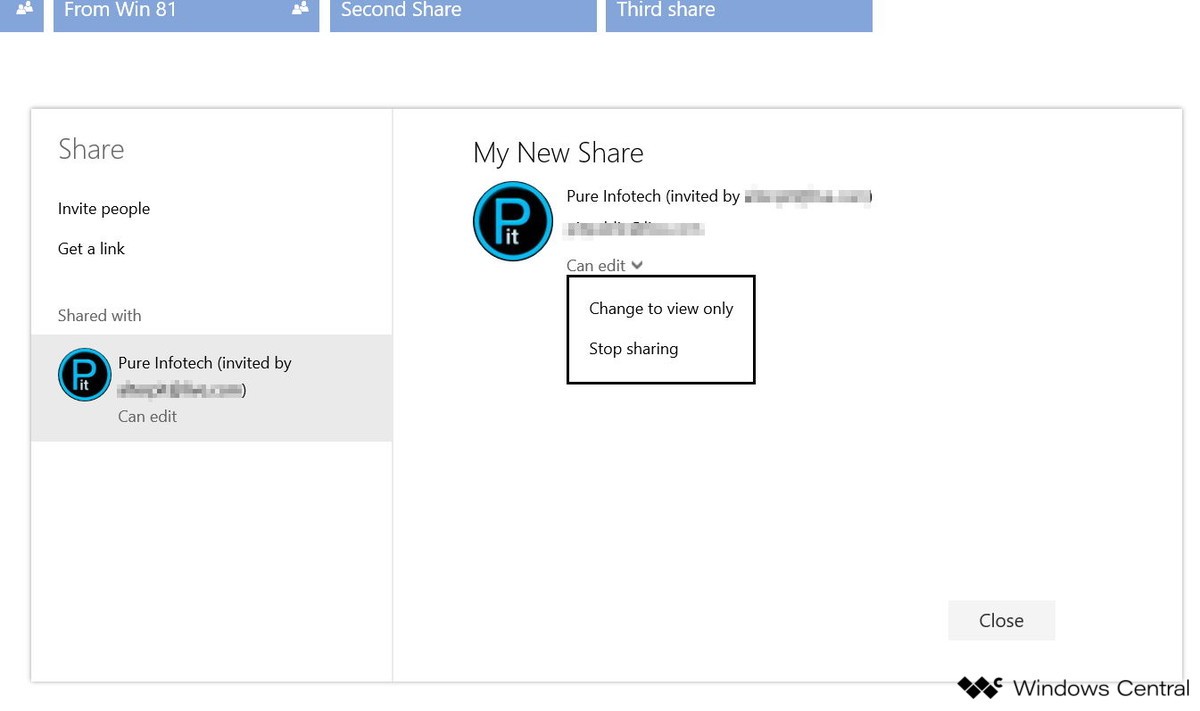
Furthermore, if you want to stop sharing a folder, deleting the folder will not stop sharing. To stop sharing, go to OneDrive online, right-click on the folder in question, choose Share, under Shared with, choose a person, and from settings, click Stop sharing. Then do the same for the other members of the directory. Once you have removed everyone and the links shared, you can safely delete that folder.

Share directly from the web
Of course, you can always sign in to your OneDrive account and share a new folder from the web interface. Just right-click on the folder and choose Share, then you will have access to all sharing options.
Conclude
As we look at today, sharing folders and files is not a very difficult task. The main thing is you need to know where to look to set the correct permissions.
OneDrive is without a doubt the best cloud storage service anyone can get on a Windows 10 PC and any device connected to a Windows machine, like smartphones and tablets. It’s secure, easy to configure, and very flexible, but only on the web. The cloud storage still needs work inside Windows 10. We can configure shared folders and other Windows options without switching to the web interface; something can do it in Windows 8.x.


