If you’re looking to review a connected Wi-Fi password on Windows 10, this is the guide for you.
By default, Windows will save passwords that users have entered when connecting to a Wi-Fi network. And in case of necessity, users can review and manage the list of Wi-Fi connections, including passwords that Windows computers have previously connected.
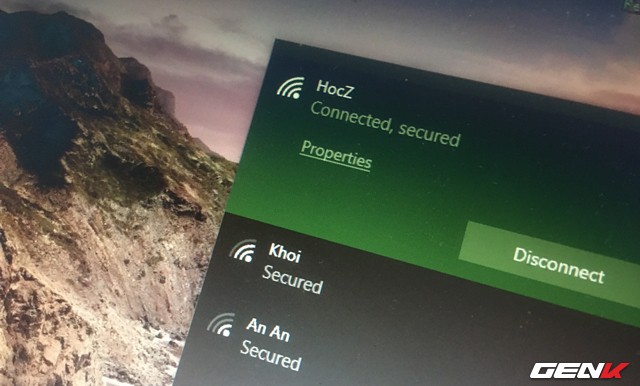
This article will suggest some ways to view and change the Wi-Fi password connected to a Windows 10 computer. Please read along.
Method 01 – Type “traditional”
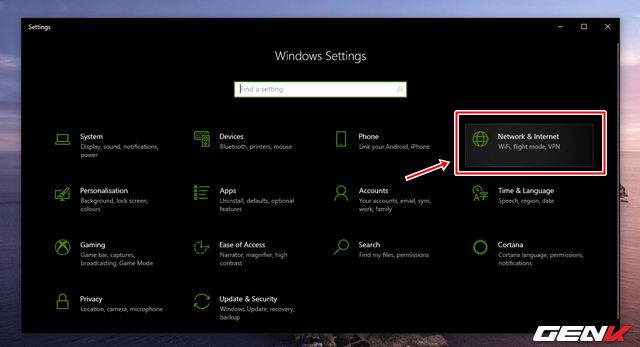
Open Settings and access the Network & Internet.
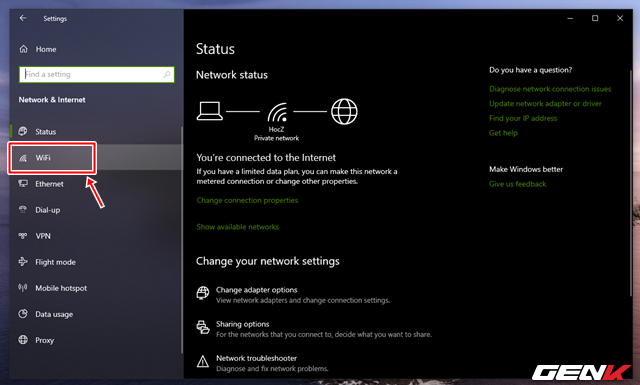
A list of Network & Internet items appears. Click “WiFi”.
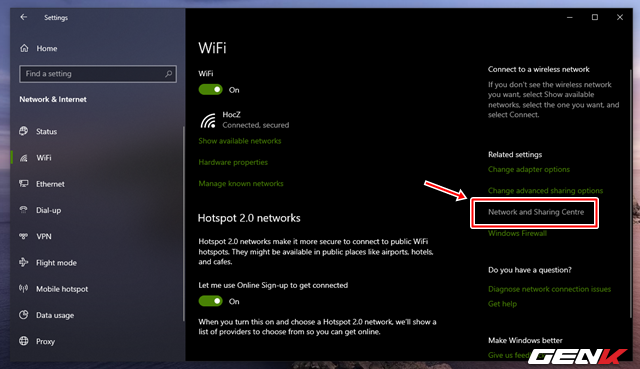
Click the “Network and Sharing Center” option.
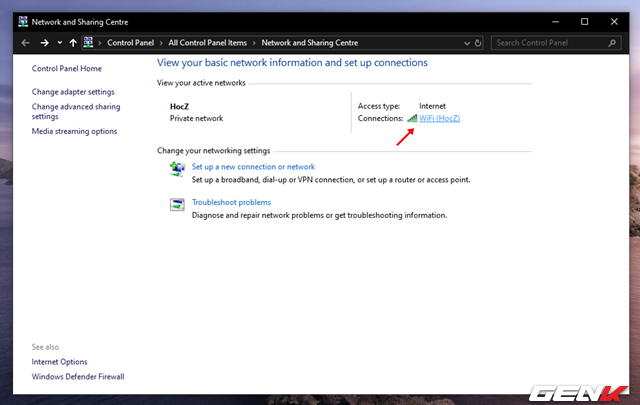
The familiar Control Panel dialog box appears and direct access to the network connection item present on the computer. At this point, click the Wi-Fi name in the Connections line.
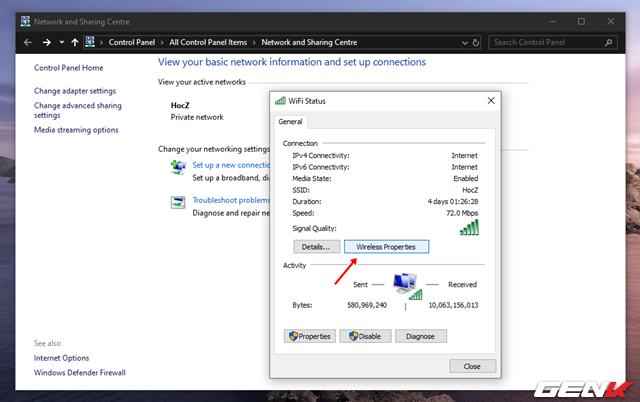
The connection status window appears. Click “Wireless Properties”.
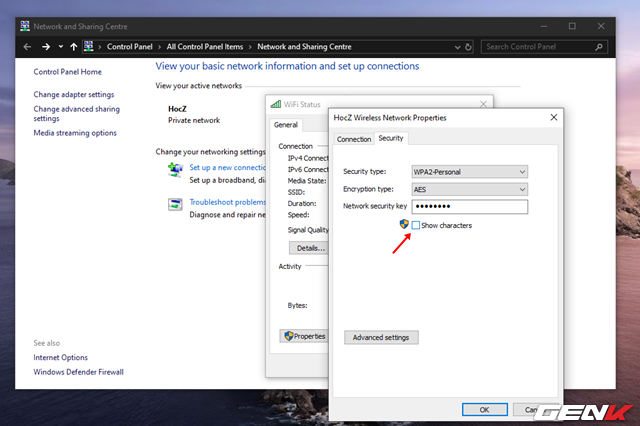
Click the Security tab in the new window that appears and check the “Show characters” line.
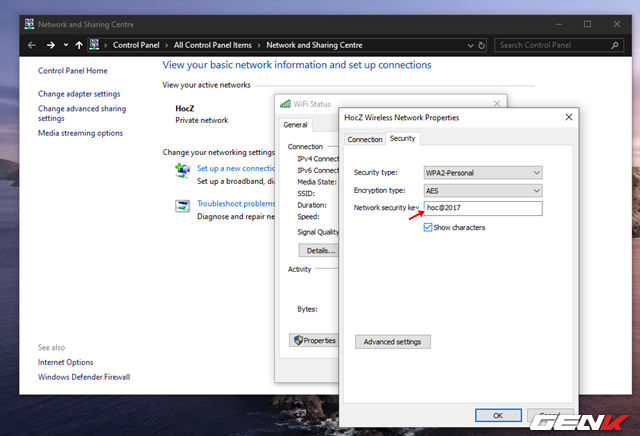
Immediately Windows will give you the password of the Wi-Fi network that the computer is connecting to in the “Network security key” line.
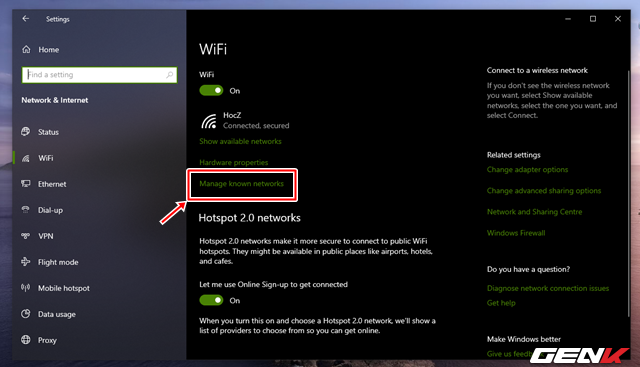
If you want to see the list of Wi-Fi networks that Windows 10 computers have connected to, you can go to Settings> Network & Internet> WiFi> Manage to know networks.
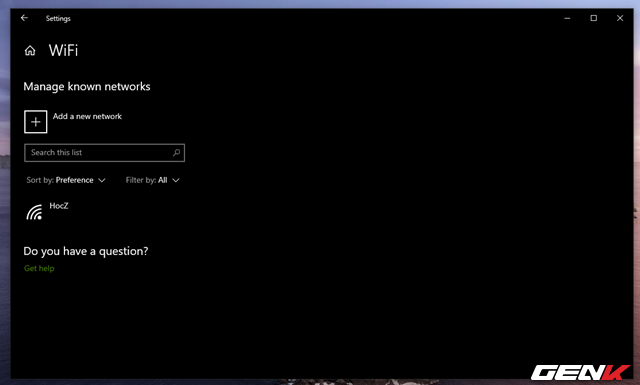
A list of Wi-Fi networks that Windows 10 computers have connected to will appear.
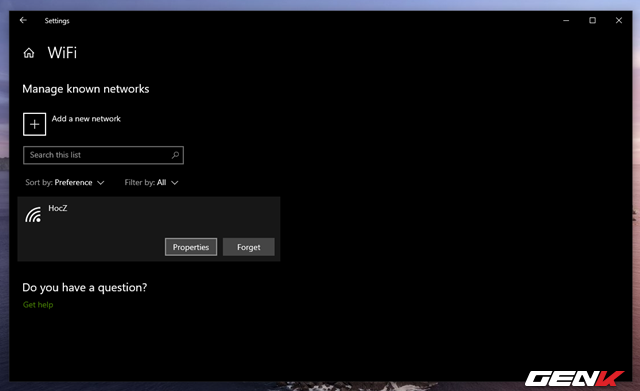
When you click on one of the Wi-Fi network names, you will be given the option to see details about that Wi-Fi network (Properties) or delete it if desired (Forget).
Method 02 – Use Windows PowerShell
If you prefer to use the command line, you can use Windows PowerShell or Command Prompt to see the Wi-Fi password.
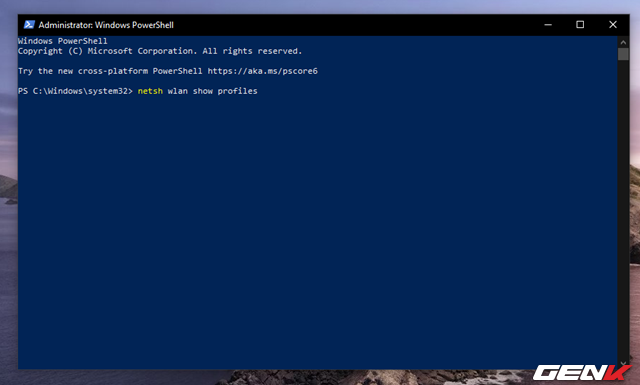
Open Windows PowerShell or Command Prompt according to your preference, enter the “netsh WLAN show profiles” command.
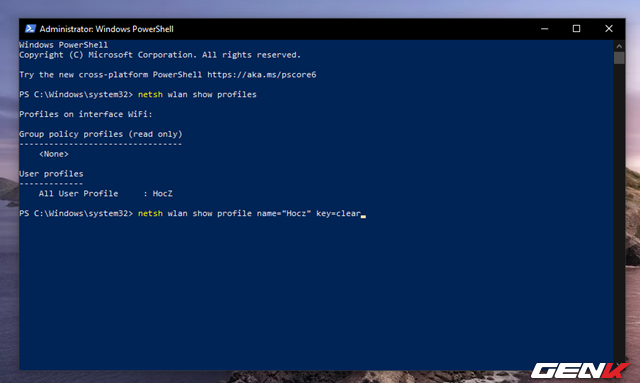
Immediately Windows will display the name of the Wi-Fi connection being used by the computer. To see the password information for this Wi-Fi network, use the command “netsh WLAN show profile name =” NETWORK “key = clear”. NETWORK is the name Wi-Fi.
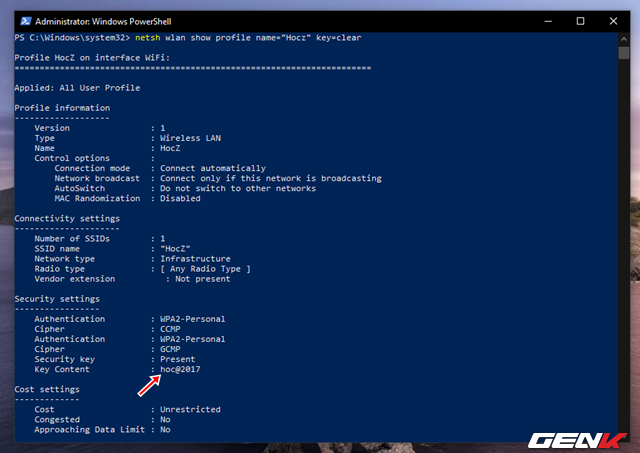
Windows will then display the details of the information and the status of the Wi-Fi network you require. Attached is the connection password that appears in the “Key Content” line.
Method 03 – Use the WirelessKeyView software of NirSoft
If you want to be faster, you can use the WirelessKeyView software, provided free of charge by NirSoft. Usage is quite simple. You need to download WirelessKeyView here, unzip and launch the software.
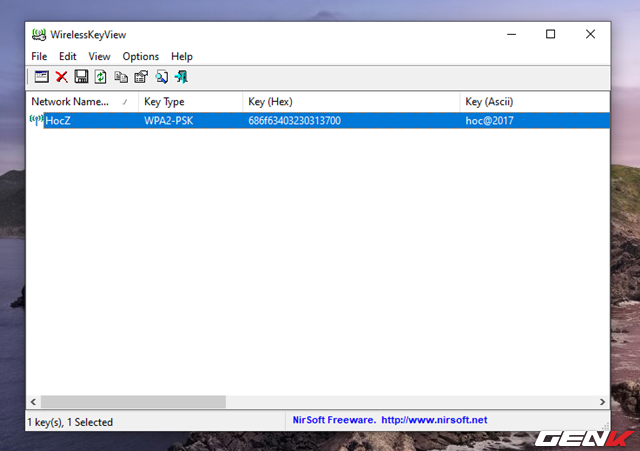
WirelessKeyView will scan and display the list of Wi-Fi networks the computer has connected to, along with a password.
Very simple, right?
Source: GenK


