A firewall prevents outsiders from accessing your computer via the Internet connection. The firewall is integrated into Windows 10. A firewall is a must if you are concerned about your computer’s safety.
Unfortunately, the Windows Firewall is not perfect and can sometimes do more harm than good, especially if another firewall program is installed.
Don’t disable Windows Firewall unless you have a good reason, but if you have another security program that performs similar functions, feel free.
Enable / Disable Firewall in Windows 10
Method 1: Turn off Windows Firewall in Windows 10 using Control Panel
Step 1: Press the Win + X key combination, then select Control Panel to access the Windows 10 Control Panel.
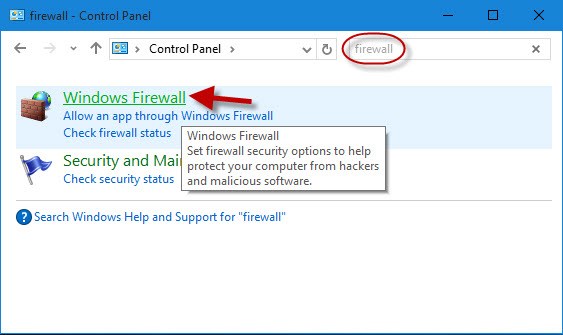
Step 2: Enter the Firewall into the search box and then click on the Windows Firewall link.
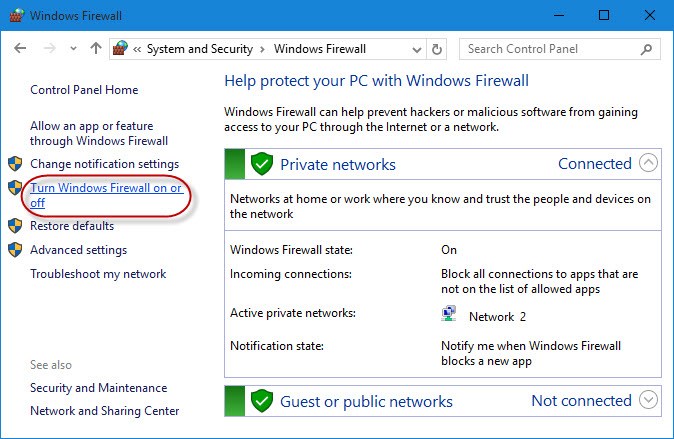
Step 3: Click Turn Windows Firewall on or off link in the left pane.
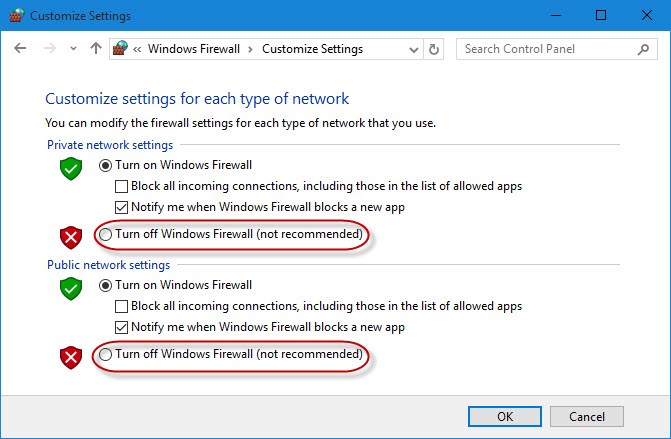
Step 4: As you can see, Windows 10 checked the option Turn on Windows Firewall by default. You can check to Turn off Windows Firewall and click OK if you want to disable it.
Method 2: Turn on / off Windows 10 Firewall with Command Prompt
You follow the steps below:
Step 1: First, open Command Prompt. To do this, enter cmd in the Search box on the Start Menu.
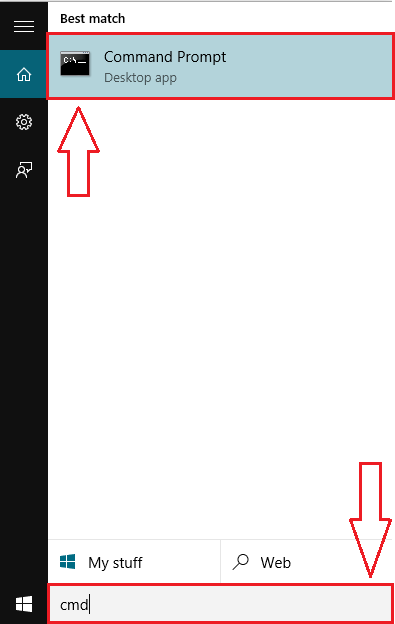
Step 2: On the search results list, right-click on Command Prompt and then click Run as an administrator to open Command Prompt under Admin.
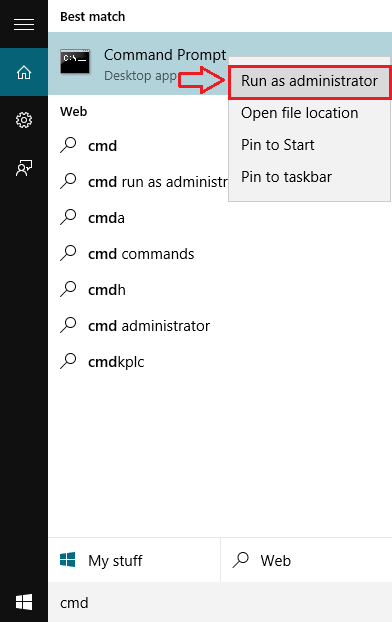
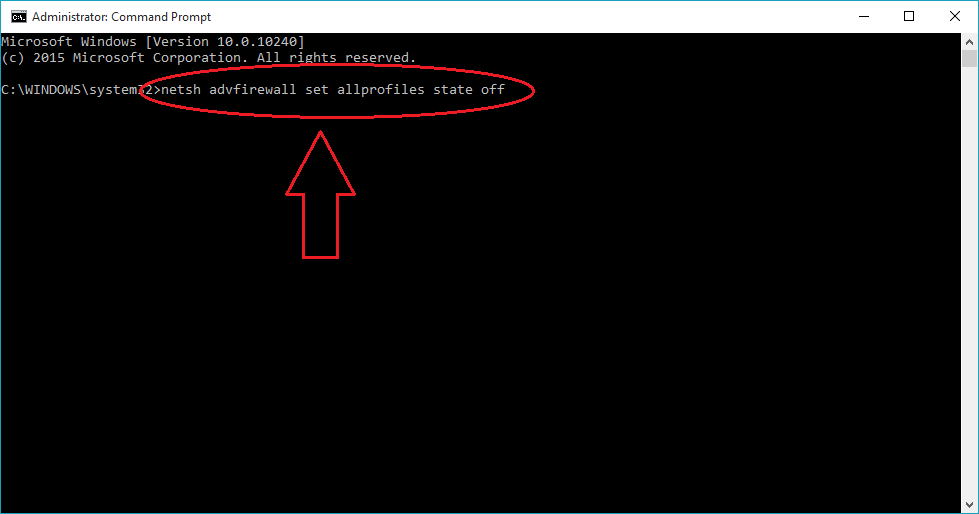
Step 3: To turn off the Windows Firewall, enter the following command in the Command Prompt window:
netsh advfirewall set allprofiles state off
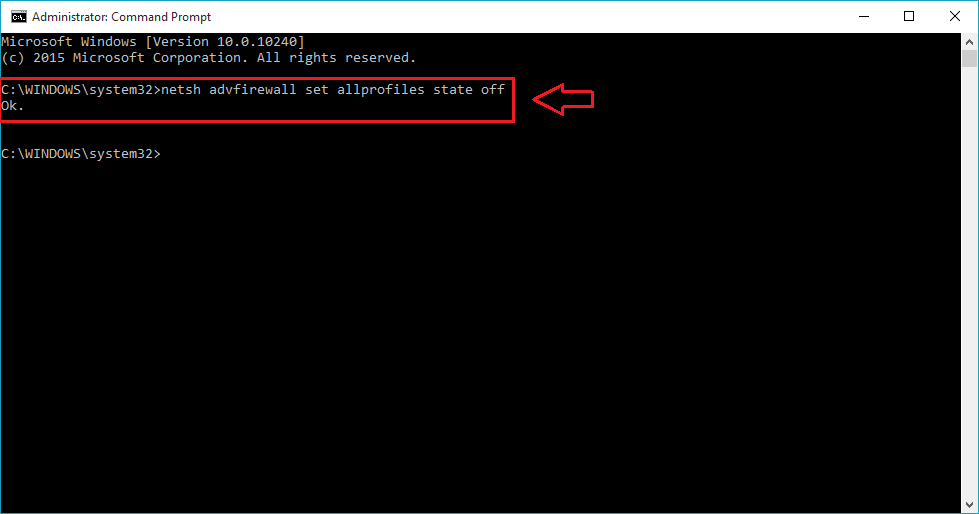
Step 4: If there are no errors, the Command Prompt window will display a message with the message OK.
Step 5: If you want to enable (re-enable) Windows Firewall, follow the same steps and enter the following command in the Command Prompt window:
netsh advfirewall set allprofiles state on

Disable Firewall in Windows Vista
Windows Firewall can be turned off in Windows Vista through the Control Panel, similar to how it is in other versions of Windows.
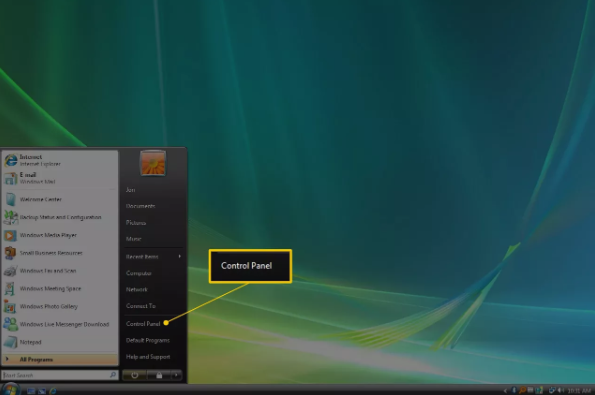
Open Control Panel in one click or tap on the Start menu and then Control Panel link.
Select Security from the list of categories.
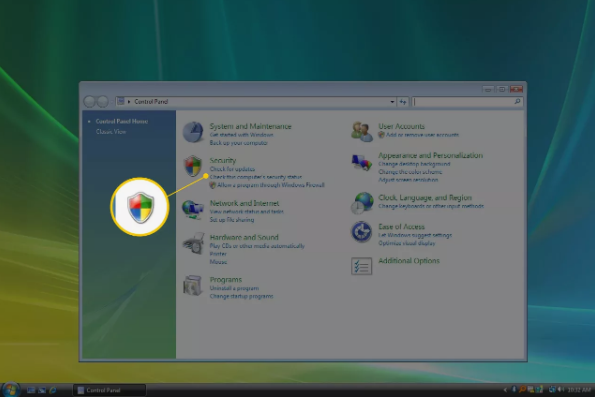
Click or tap Windows Firewall.

Select Turn Windows Firewall on or off on the left side of the window.
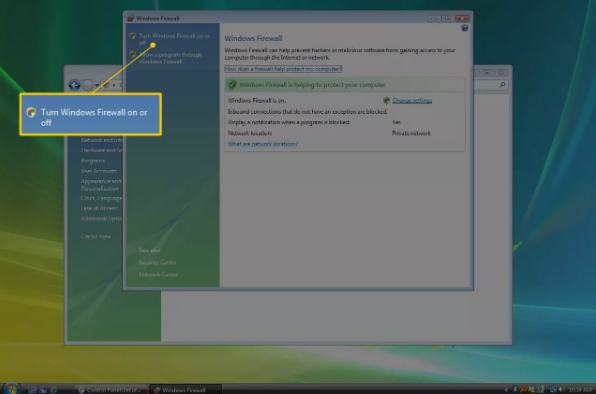
Note: If the User Account Control window pops up, go ahead and click/tap on it by entering the administrator password or selecting Continue.
Instructions: If you need to reaccess this window faster in the future, you can use the command control firewall.cpl in the Run dialog box.
Open the General tab in the “Windows Firewall settings” window and select the bubble next to Off (not recommended).
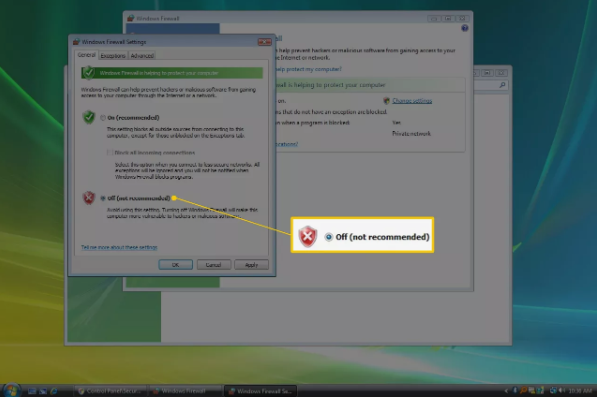
Click or click OK to apply the changes.
Disable Firewall in Windows XP
The instructions for disabling the Windows XP firewall are significantly different from newer versions of Windows, but it’s still pretty straightforward.
Open Control Panel by clicking or clicking Start and then Control Panel.
Click or click Network and Internet Connections.

Note: If you view the “Classic View” of Control Panel, double-click or double-click Network Connections and go to Step 4.
Click or click Network Connections in the “or pick a Control Panel icon” section.

Right-click or tap and hold on your network connection and select Properties.

Open the Advanced tab and click Settings.
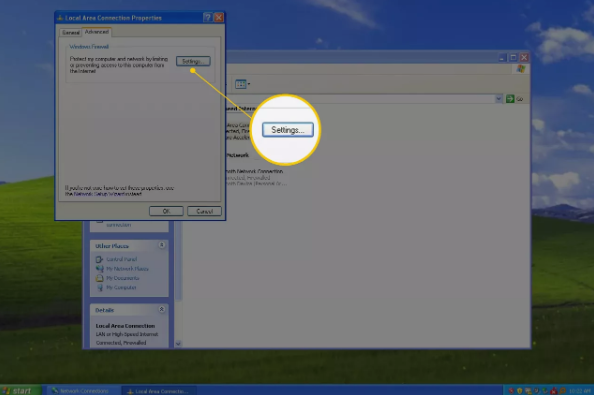
Select the Off button to turn it off.
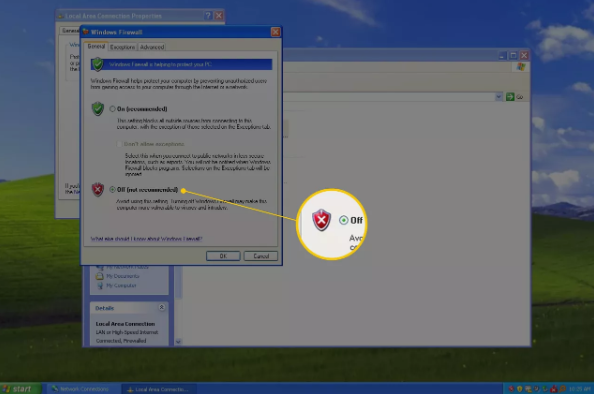
Click or click OK in this window and click OK again in the “Properties” window of your network connection. You can also close the “Network Connections” window.


