Making the cursor larger or reversing the default color to black to make it more prominent on a white background is the main reason. Change mouse cursors for various built-in Windows 10 “themes” – functions like collections of cursors for regular operation, text selection, hyperlinks, etc. – pretty straightforward. Still, users can also customize individual images or install themed packages.
Single mouse pointer changes
1. Press the Windows key, type Change how the mouse pointer looks in the Windows search box, and press Enter.
In Windows 8, typing anywhere on the Start Screen will automatically bring up the search box.
2. In the Mouse Properties window that appears, click the Pointers tab.
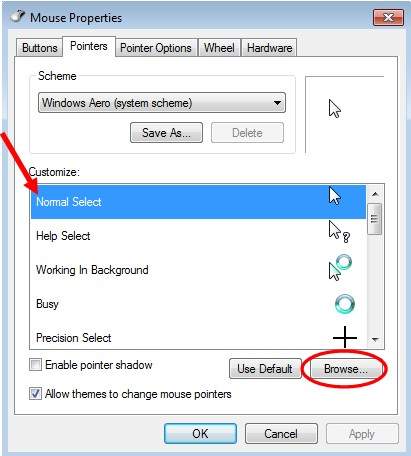
3. On the Pointers tab (shown below), select the mouse pointer you want to change under Customize and then click Browse.

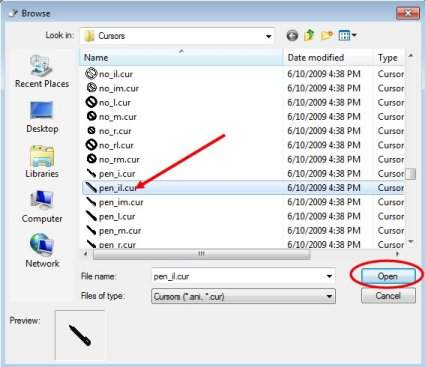
4. Clicking the Browse button will display a list of all installed cursors on your hard drive.

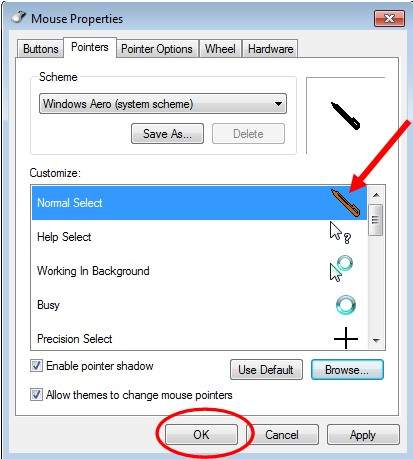
5. After selecting the replacement cursor, you will see it change in the Mouse Properties window.

6. Click Apply and then OK to save the changes.
Change multiple mouse pointers
1. Press the Windows key, type Change how the mouse pointer looks in the Windows search box, and press Enter.
In Windows 8, typing anywhere on the Start Screen will automatically bring up the search box.
2. In the Mouse Properties window that appears, click the Pointers tab.
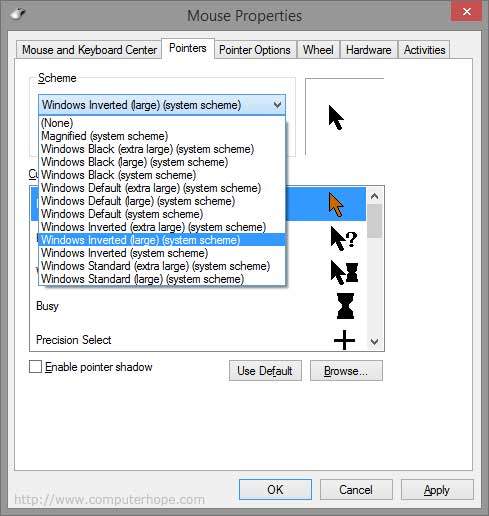
3. On the Pointers tab (shown below), click the down arrow in the box under Scheme and select a different pointer scheme.

4. Once a new plan has been selected, you can preview how it will affect each different mouse pointer by scrolling through the Customize window.
5. Once you are satisfied with your new selection, click Apply, and then OK.


